Introduction#
In this lesson, we’ll add a basic attack animation to our player and detect collisions between the player’s attack and an enemy. This process involves setting up an attack input, creating hitboxes (on the player) and hurtboxes (on the enemy), and controlling when those hitboxes are active so the enemy only gets damaged during the actual attack frames.
Adding an Attack Animation#
First, we need an animation that shows our character in the act of attacking.
Create the Animation
Open yourheavy_blade.tscn(player scene), select the AnimationPlayer, and create a new animation calledbasic_attack. Add the frames (or keyframes) that visually represent your character’s swinging motion. This ensures we have a dedicated sequence for the attack, separate from idle and run.Adjust Timing and Frames
Once you’ve added the frames, adjust the length so the motion feels responsive. Too long might make your character feel sluggish, and too short may be barely noticeable. You can test different speeds until it looks right.
At this point, you’ll have an animation that looks good in the editor but isn’t triggered by any in-game input yet.
Here’s my basic attack animation (You can copy it if you want):
Adding Attack Input#
Next, let’s make it so pressing a key triggers the new basic_attack animation.
Create a New Input Action
Go to Project > Project Settings > Input Map, add a new action namedbasic_attack, and assign it to theZkey. This separates your attack logic from a specific key, allowing you to rebind it easily later if needed.Detect Input in Your Script
In yourheavy_blade.gd, add or modify_unhandled_input(event)to look for thebasic_attackaction. When it’s pressed, play thebasic_attackanimation:func _unhandled_input(event): if event.is_action_pressed("basic_attack"): animation_player.play("basic_attack")Avoid Overwriting the Attack Animation
Since you might already have code that changes the player’s Sprite2D frames during movement, make sure you don’t overwrite thebasic_attackanimation when the player tries to move. A simple check in your_process(delta)or movement function can skip updating animations ifbasic_attackis playing:... if animation_player.current_animation != "basic_attack": if velocity.x > 0: animation_player.play("move_right") elif velocity.x < 0: animation_player.play("move_left") elif velocity.y != 0: animation_player.play("move_right") else: animation_player.play("idle") ...
Now, pressing Z will trigger the attack animation. However, it still doesn’t affect anything else in the game.
Creating a Dummy Enemy#
Let’s introduce an enemy to see if our player’s attack can have an effect.
New Scene for the Enemy
Create a new scene calleddummy.tscn, and use a Sprite2D as the root node. Assign it any enemy or placeholder texture you have. Or you use the one I provided: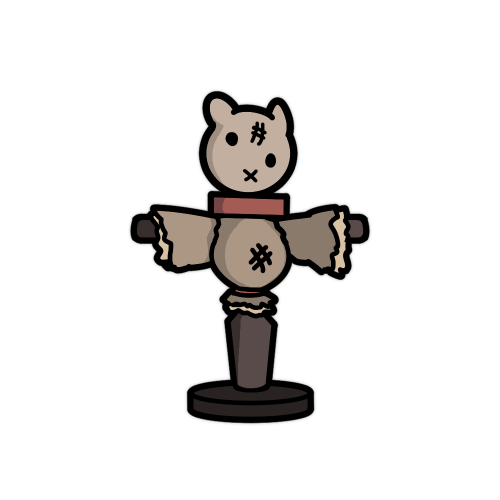
Basic Setup
This enemy won’t move or fight back right now—it’s just there for you to test hitting it. Add a simple script (dummy.gd) to prepare for health or other logic later. Adjust the scale if it’s too big or too small.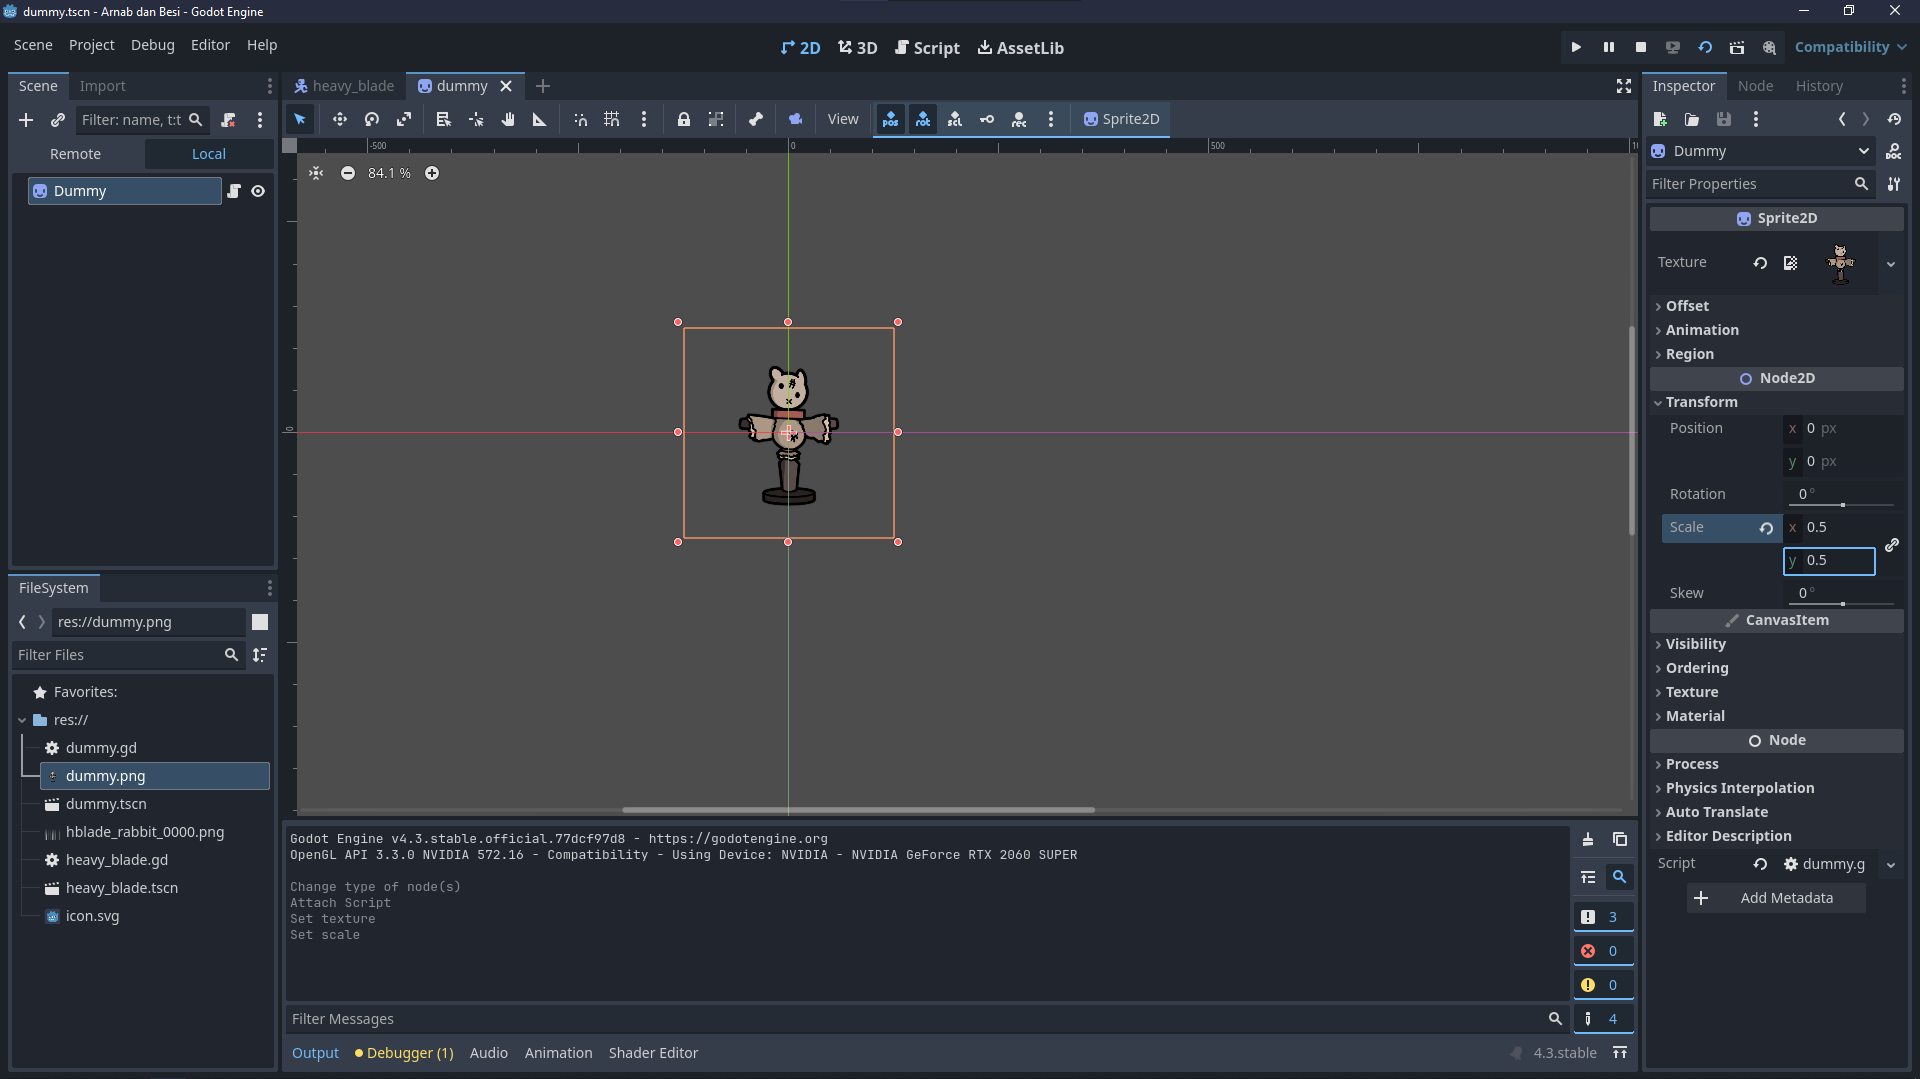
Making a Lobby Scene#
We need both the player and the dummy enemy in one scene so they can interact.
Create
lobby.tscn
Add a Node2D as the root. This will serve as your “level” or “room” where you place objects.Instance Player and Enemy
Dragheavy_blade.tscn(player) anddummy.tscn(enemy) intolobby.tscn. Position them however you like.Test It Out
Runlobby.tscn, move your player, and pressZto attack. You’ll see the animation, but the enemy won’t react, because we haven’t set up any collision or damage system yet.
Making the Enemy Take Damage#
When we talk about attacking, there are generally two sides:
- Hitbox: The area on the attacking character that will deal damage.
- Hurtbox: The area on the defending character that can receive damage.
Adding a Hitbox#
Player Hitbox#
Add an Area2D
Inheavy_blade.tscn, add a child node to your player root node. Call itBasicAttackHitboxand set it to Area2D. This node will detect overlaps with enemy areas.Add a CollisionShape2D
As a child ofBasicAttackHitbox, add a CollisionShape2D. Size and shape it so it roughly matches where your attack will hit.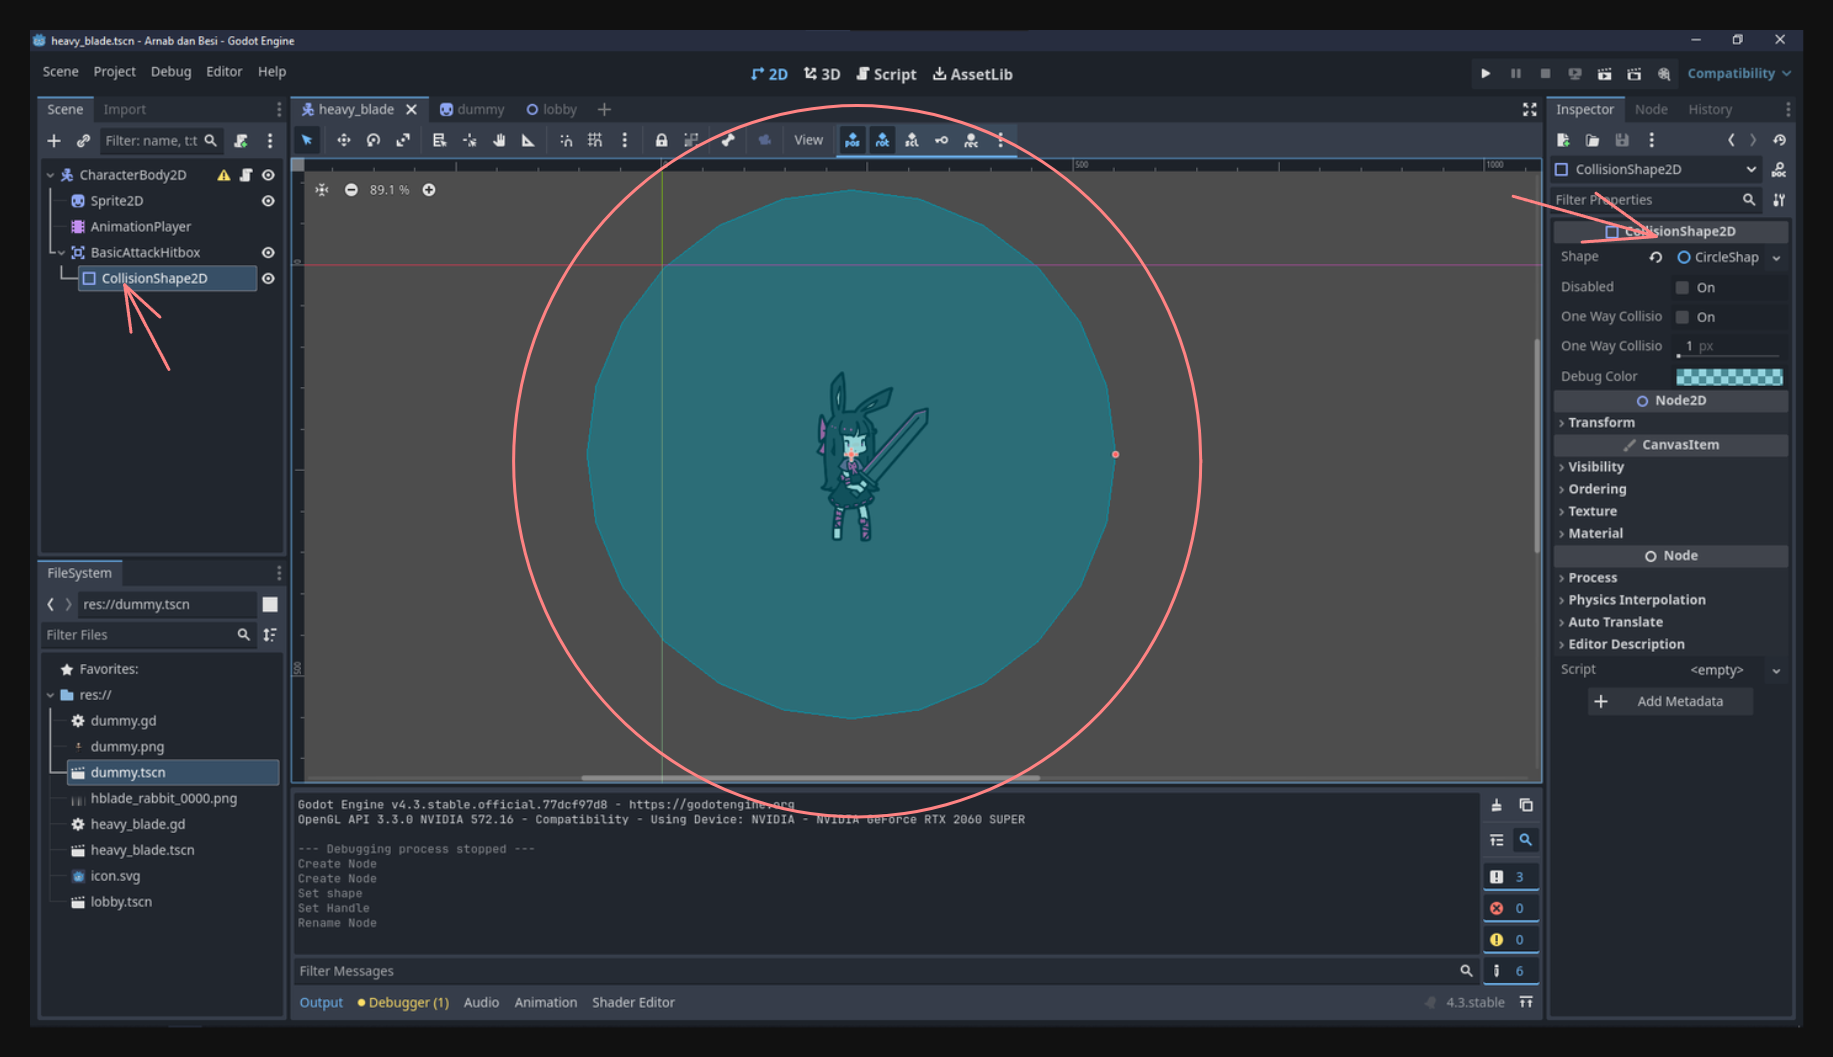
Assign Collision Layers
In the Inspector forBasicAttackHitbox, set the Collision Layer (what it “is”) to1and the Collision Mask (what it “sees”) to2. This means it belongs to layer 1 and will detect objects on layer 2.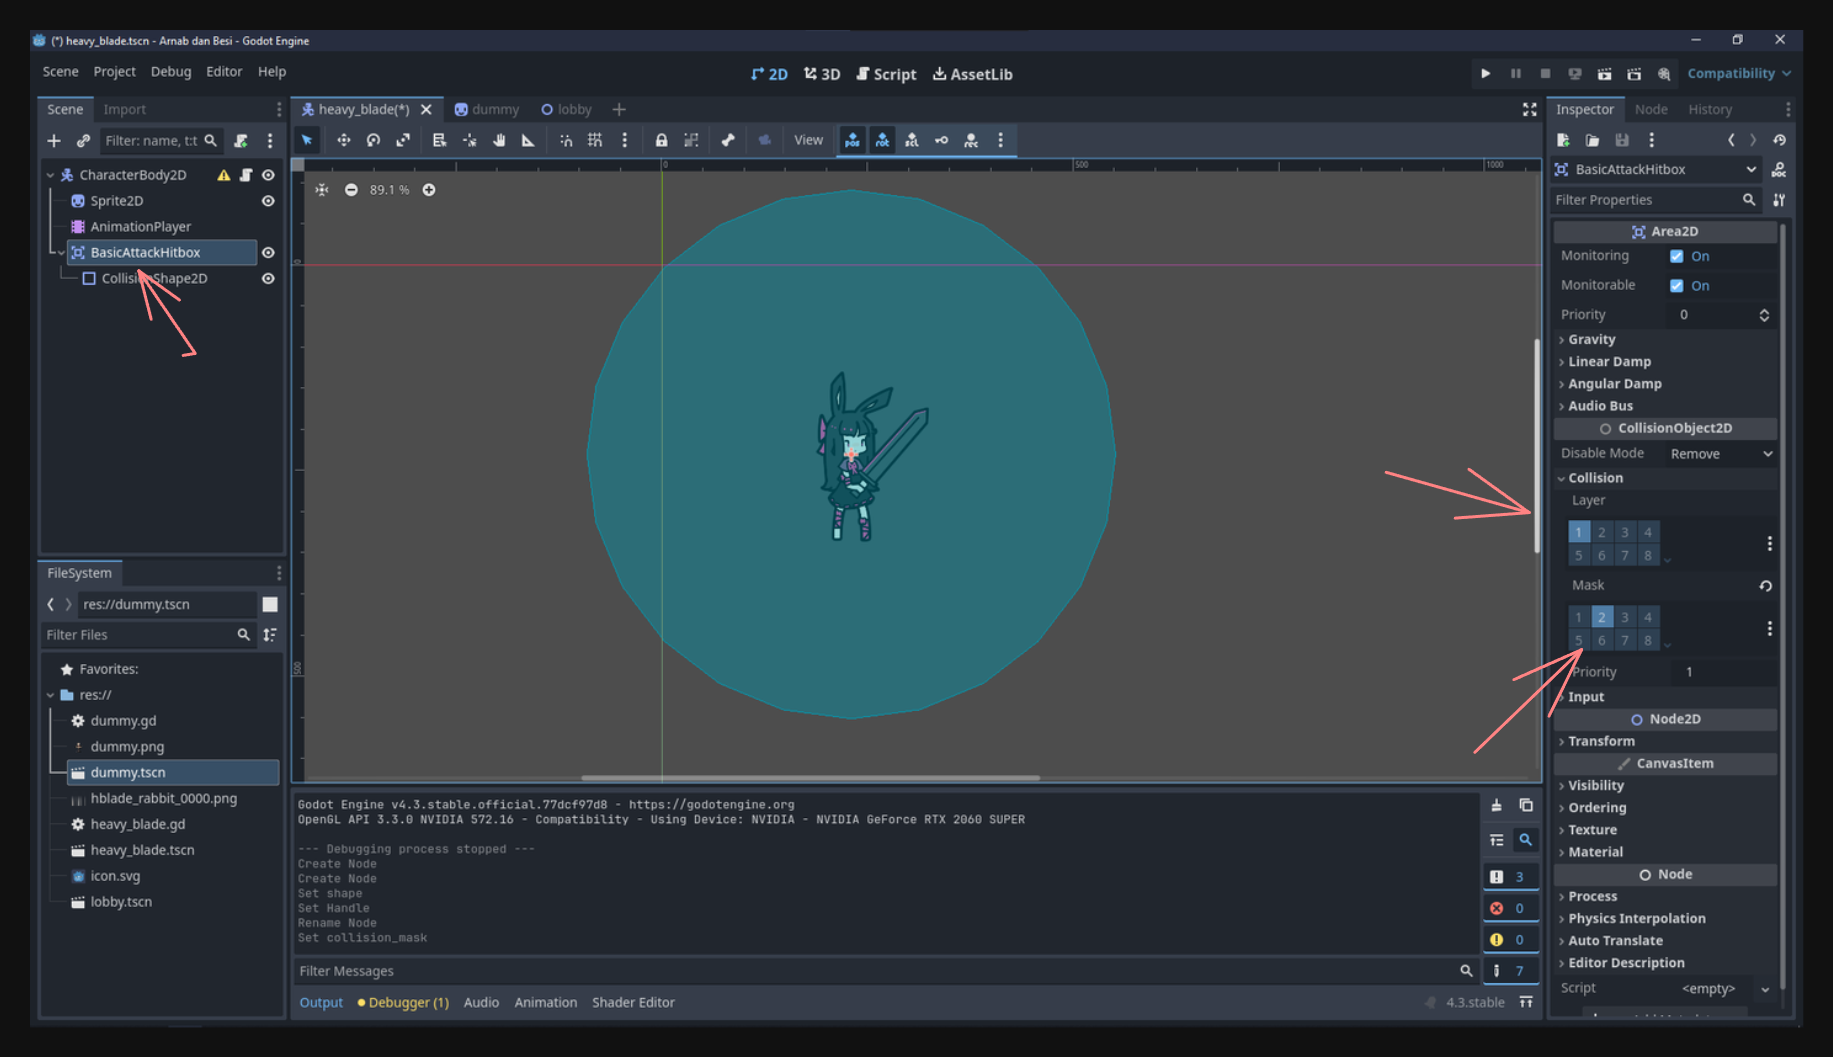
Enemy Hurtbox#
Add an Area2D
Indummy.tscn, add a child node calledHurtbox(also Area2D). This defines where the enemy can be hit.Add a CollisionShape2D
UnderHurtbox, add a CollisionShape2D that covers the enemy’s sprite.Assign Collision Layers
In the Inspector, set Collision Layer to2and Collision Mask to1. This means the enemy’s hurtbox lives on layer 2 and detects objects on layer 1—perfect for matching your player’s hitbox.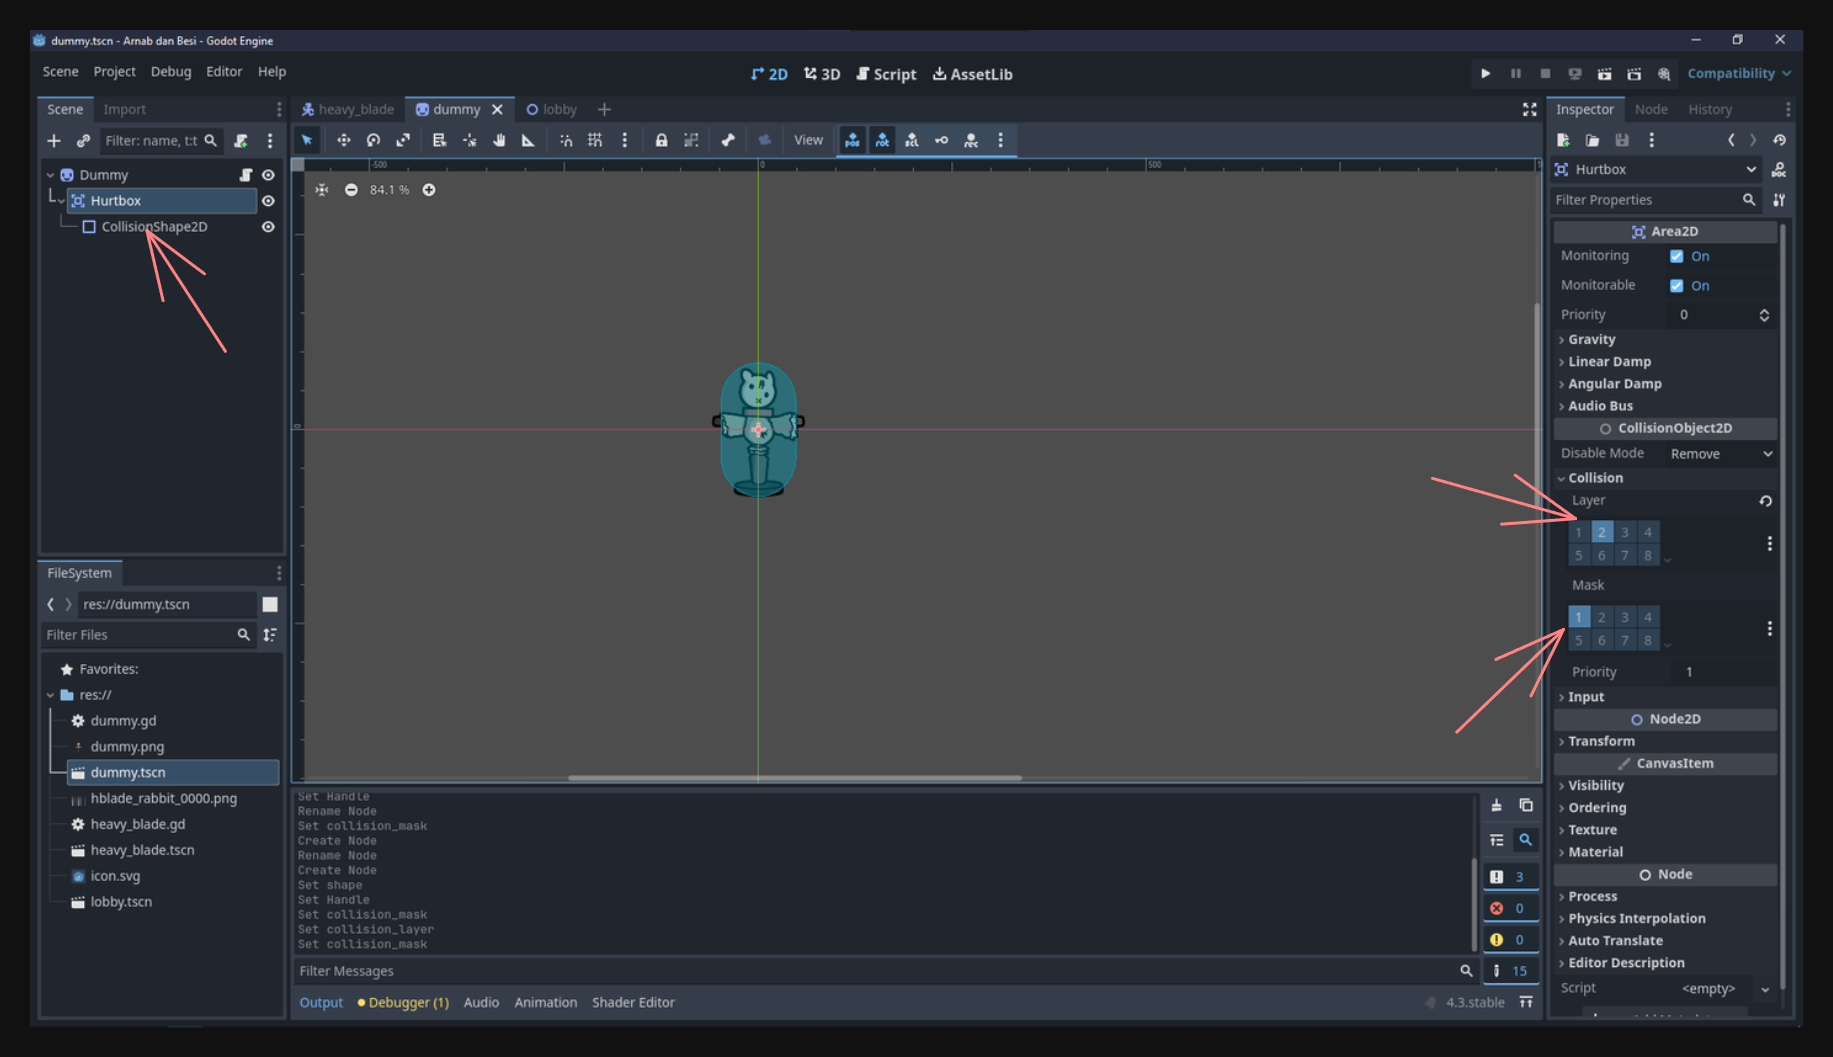
By setting layers and masks this way, the player’s hitbox only interacts with the enemy’s hurtbox, preventing unwanted collisions with other layers.
Connecting Signals and Dealing Damage#
Now that the hitbox and hurtbox exist, we can tell the enemy to react when those two areas overlap.
Enable Monitoring
In bothBasicAttackHitboxandHurtbox, check Monitoring and Monitorable so they’ll detect overlaps.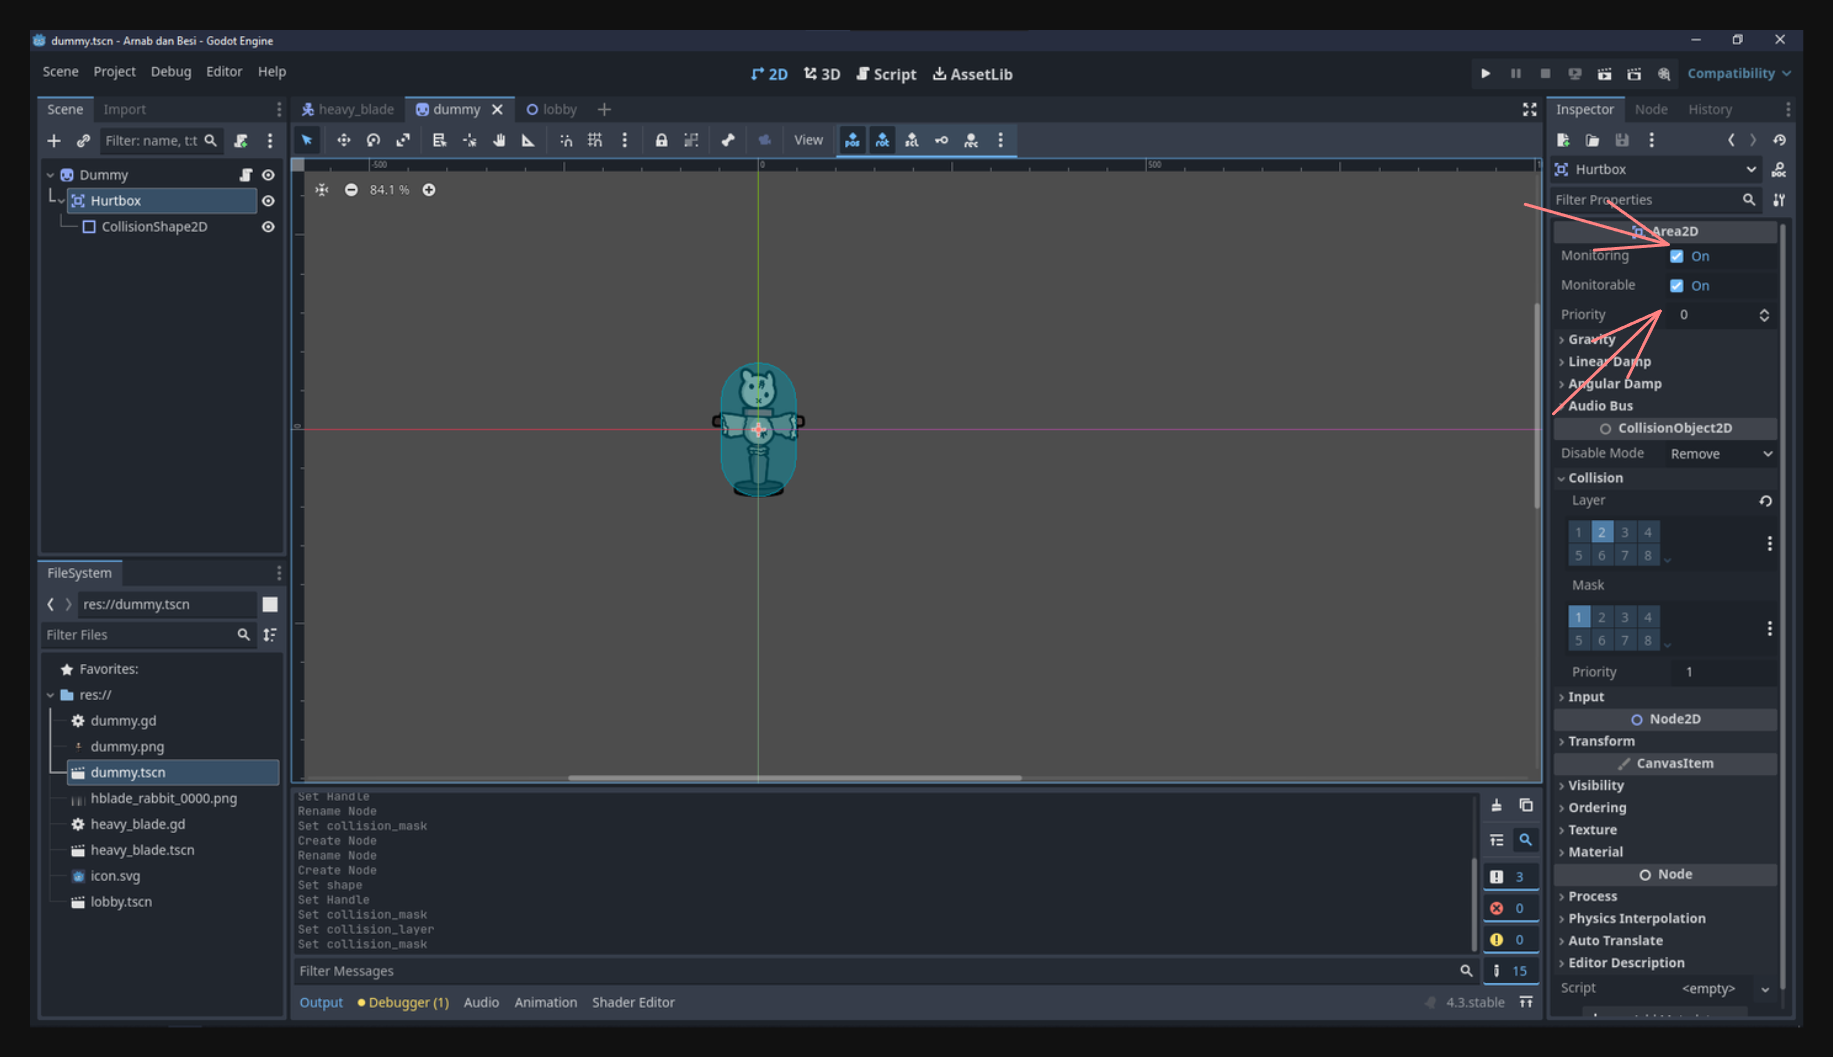
Connect
area_enteredon the Enemy
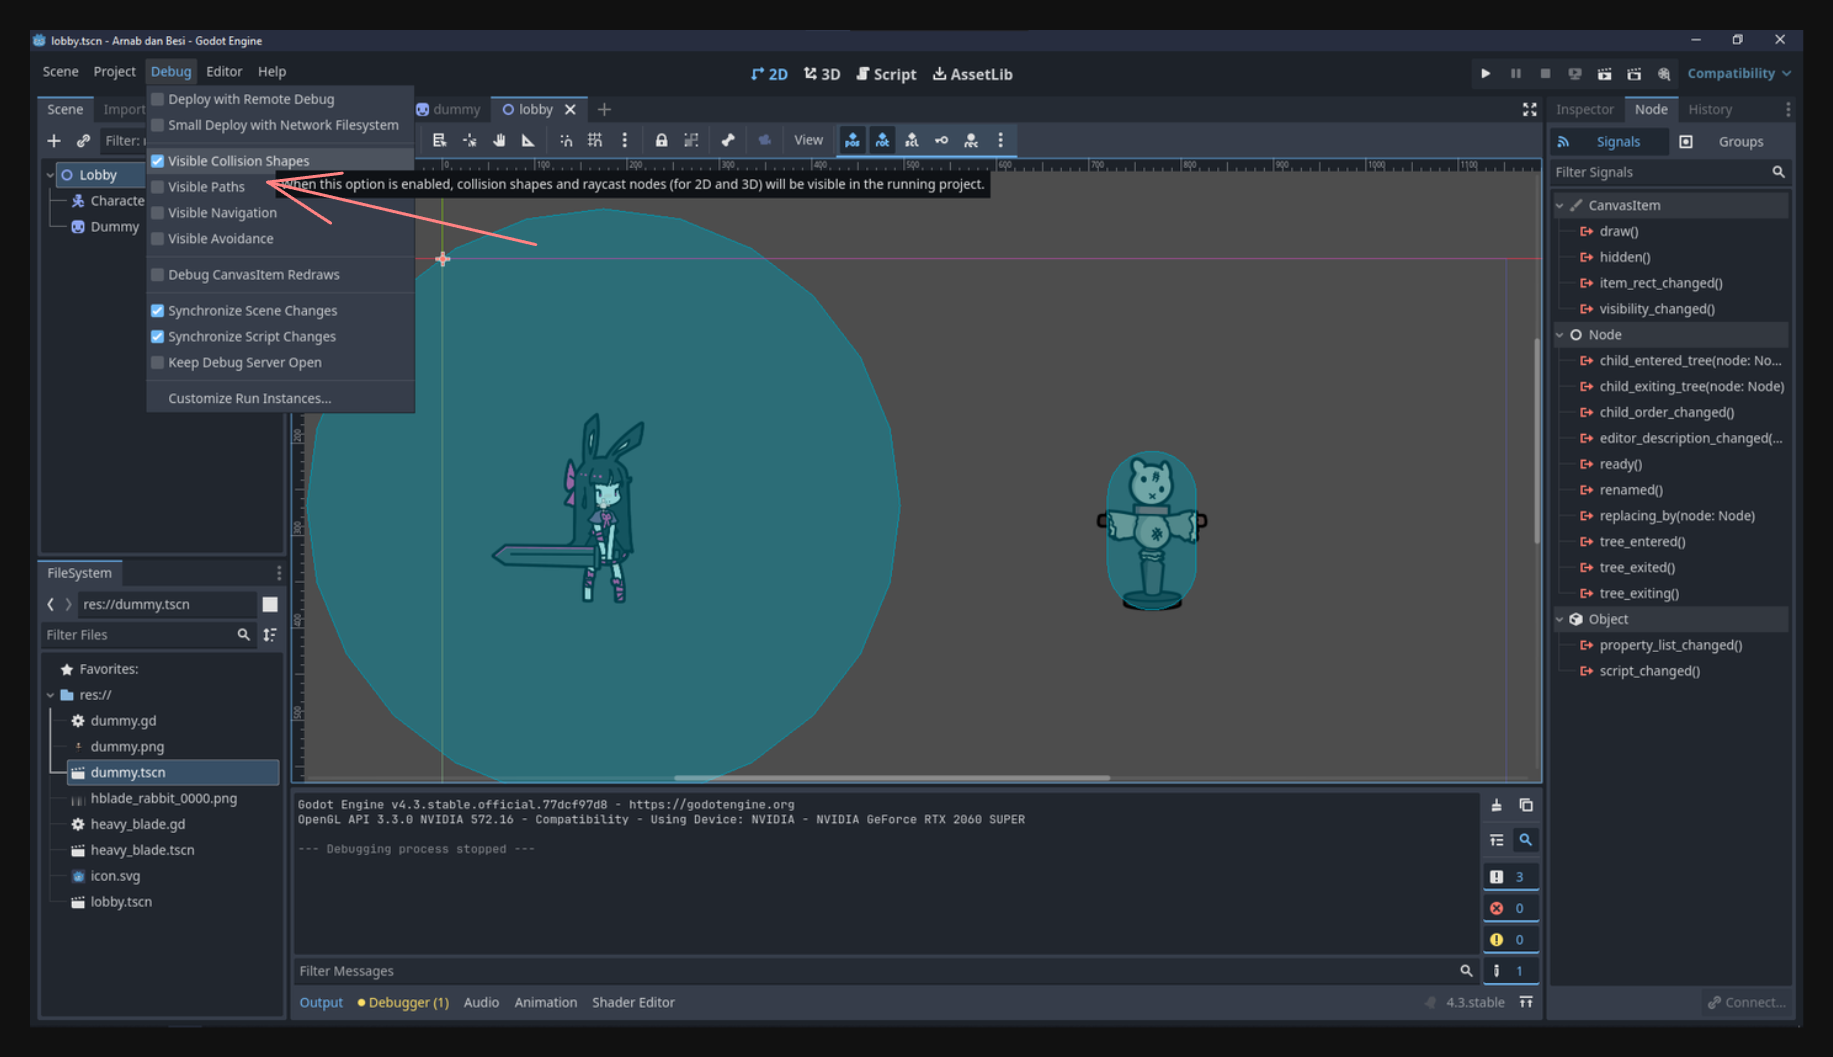
SelectHurtboxindummy.tscn, go to the Node tab > Signals, and connectarea_enteredto yourdummy.gdscript. You’ll get a function like:func _on_hurtbox_area_entered(area: Area2D): if area.name == "BasicAttackHitbox": queue_free()For testing, we’re simply calling
queue_free()to remove the enemy immediately. However, this will trigger even if your hitbox is active while idle (not actually swinging). We’ll fix that next.For debugging you can show the collision by activating it in the debug menu.
Activating the Hitbox Only During Attack#
Disable Hitbox by Default
InBasicAttackHitbox’s CollisionShape2D Inspector, check Disabled. That way, your hitbox is off until you decide to enable it.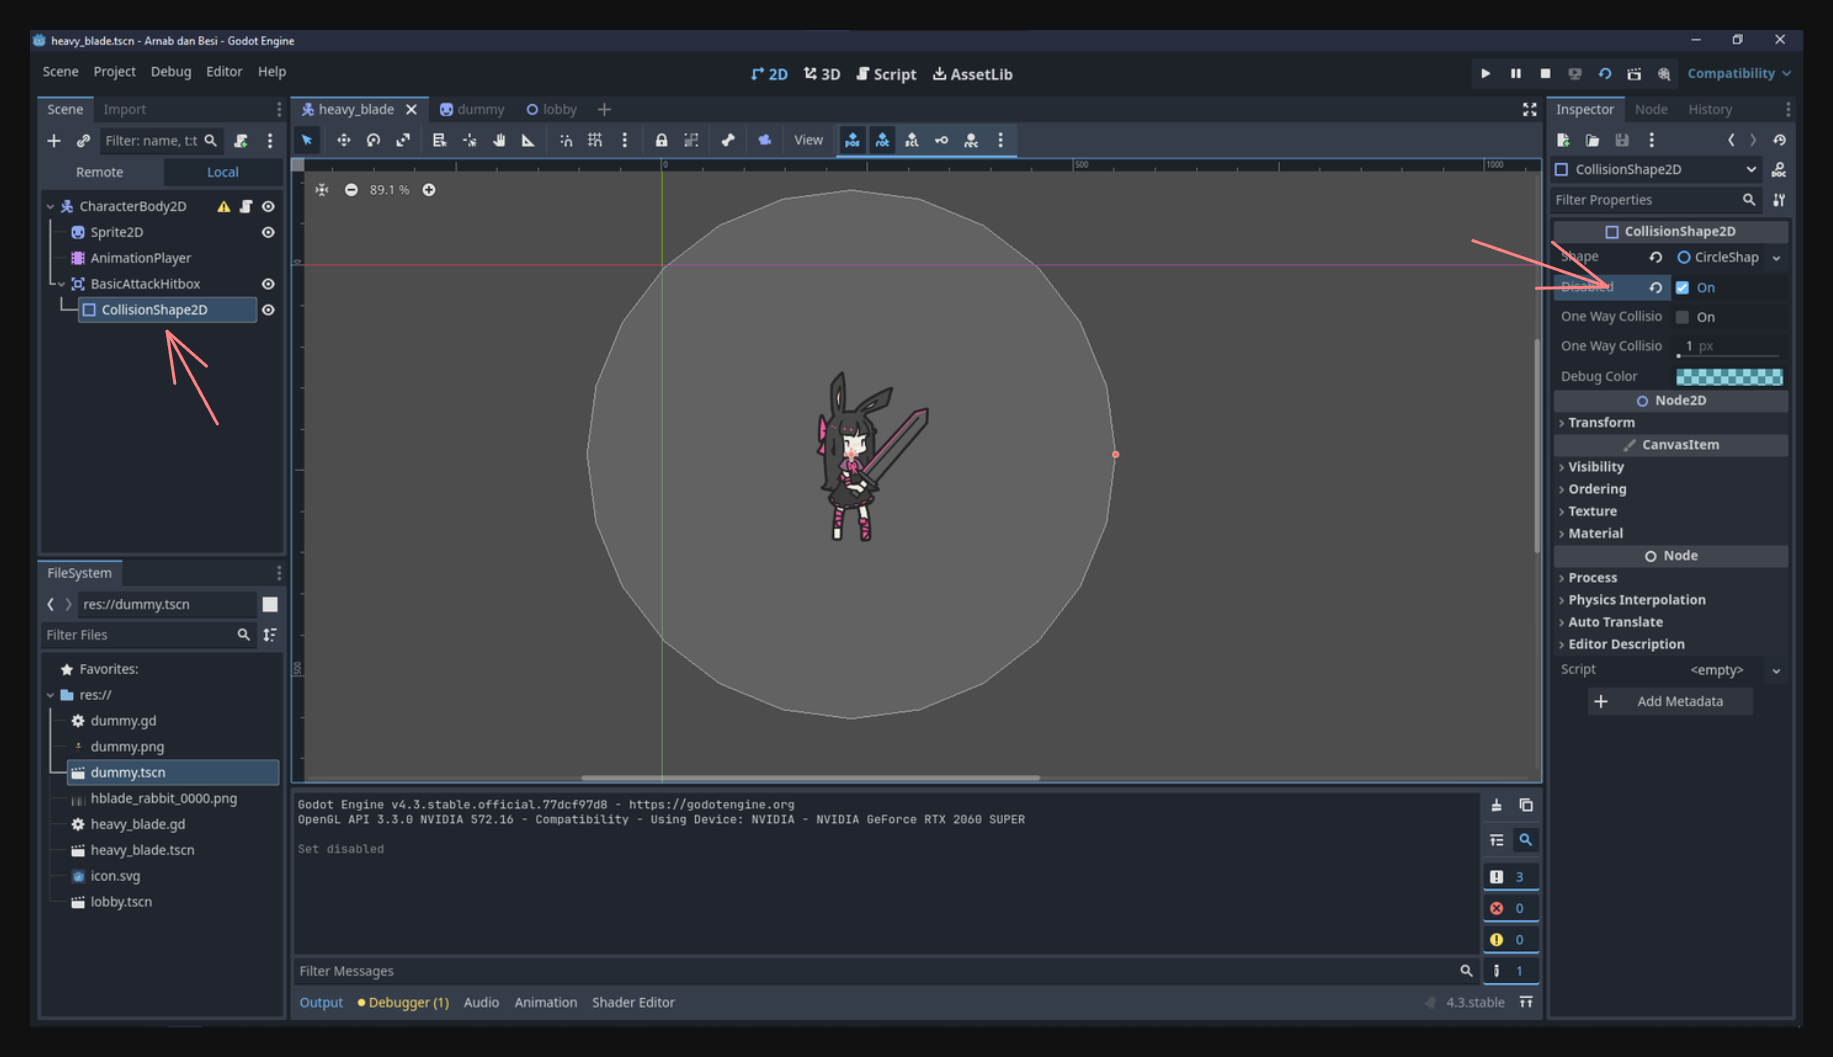
Toggle via Animation
Inheavy_blade.tscn, open theAnimationPlayer. For thebasic_attackanimation, add a Property Track for yourBasicAttackHitboxCollisionShape2D node’sdisabledproperty. At the frame where the weapon should connect, key it totrue, and near the end of the swing, key it back tofalse.Now, the enemy will only take damage during the exact frames your attack is active.
Adding Health Logic to the Enemy#
If you don’t want your enemy to vanish in one hit, you can track its health:
var hp = 3

func _on_hurtbox_area_entered(area: Area2D):
    if area.name == "BasicAttackHitbox":
        hp -= 1
        if hp <= 0:
            queue_free()
This way, the enemy can require multiple hits to defeat.
Conclusion#
By following these steps, you’ve successfully:
- Created a dedicated attack animation and tied it to an input action.
- Prevented your movement animations from overriding the attack.
- Added Area2D nodes to form a basic hitbox/hurtbox system.
- Used collision layers and masks to ensure only the player’s attacks collide with the enemy’s hurtbox.
- Activated the hitbox only during attack frames through the animation timeline.
- Allowed the enemy to have health (or no health) and get destroyed when it drops to zero.
With this foundation, you can expand your combat system by adding different attack types, varying damage, enemy knockback, or more sophisticated AI. Now your game has a functional combat loop—press Z to attack, and watch your dummy enemy react (or die) accordingly. Enjoy experimenting with these new tools in Godot!
I’ll see you in the next lesson!